Detecting hidden processes
In this use case, we show how ThreatLockDown detects hidden processes created by a rootkit on a Linux endpoint. In this use case, you deploy a kernel-mode rootkit on an Ubuntu endpoint.
This rootkit hides from the kernel module list. It also hides selected processes from the ps utility. However, ThreatLockDown detects it using setsid(), getpid(), and kill() system calls.
The Malware detection section of our documentation contains more details about how the ThreatLockDown detects malware and the rootcheck module.
Infrastructure
Endpoint |
Description |
|---|---|
Ubuntu 22.04 |
On this endpoint, download, compile, and load a rootkit. Then, configure the ThreatLockDown rootcheck module on this endpoint for anomaly detection. |
Configuration
Perform the following steps on the Ubuntu endpoint to emulate a rootkit, and to run a rootcheck scan to detect it.
Switch to the root user and update the kernel of this endpoint:
$ sudo su
# apt update
Install packages required for building the rootkit:
# apt -y install gcc git
Next, configure the ThreatLockDown agent to run rootcheck scans every 2 minutes. In the
/var/ossec/etc/ossec.conffile. Set thefrequencyoption in the<rootcheck>section to120:<rootcheck> <disabled>no</disabled> <check_files>yes</check_files> <check_trojans>yes</check_trojans> <check_dev>yes</check_dev> <check_sys>yes</check_sys> <check_pids>yes</check_pids> <check_ports>yes</check_ports> <check_if>yes</check_if> <!-- rootcheck execution frequency - every 12 hours by default--> <frequency>120</frequency> <rootkit_files>etc/shared/rootkit_files.txt</rootkit_files> <rootkit_trojans>etc/shared/rootkit_trojans.txt</rootkit_trojans> <skip_nfs>yes</skip_nfs> </rootcheck>
Restart the ThreatLockDown agent to apply the changes:
# systemctl restart wazuh-agent
Attack emulation
Ubuntu endpoint
Fetch the Diamorphine rootkit source code from GitHub:
# git clone https://github.com/m0nad/Diamorphine
Navigate to the Diamorphine directory and compile the source code:
# cd Diamorphine
# make
Load the rootkit kernel module:
# insmod diamorphine.ko
The kernel-level rootkit “Diamorphine” is now installed on the Ubuntu endpoint.
Note
Depending on the environment, the module sometimes fails to load or function properly. If you receive the error
insmod: ERROR: could not insert module diamorphine.ko: Invalid parametersin the last step, you can restart the Linux endpoint and try again. Sometimes it takes several tries for it to work.Run the kill signal
63with the PID of a random process running on the Ubuntu endpoint. This unhides the Diamorphine rootkit. By default, Diamorphine hides itself so we don’t detect it by running thelsmodcommand. Try it out:# lsmod | grep diamorphine # kill -63 509 # lsmod | grep diamorphine
diamorphine 13155 0
When using these last commands, you can expect an empty output. In the case of Diamorphine, any kill signal
63sent to any process whether it exists or not, toggles the Diamorphine kernel module to hide or unhide.Run the following commands to see how the
rsyslogdprocess is first visible and then no longer visible. This rootkit allows you to hide selected processes from thepscommand. Sending a kill signal31hides/unhides any process.# ps auxw | grep rsyslogd | grep -v grep
root 732 0.0 0.7 214452 3572 ? Ssl 14:53 0:00 /usr/sbin/rsyslogd -n
# kill -31 <PID_OF_RSYSLOGD>
# ps auxw | grep rsyslog | grep -v grep
When using this last command, you can expect an empty output.
The next rootcheck scan will run and alert us about the rsyslogd process which was hidden with the Diamorphine rootkit.
Visualize the alerts
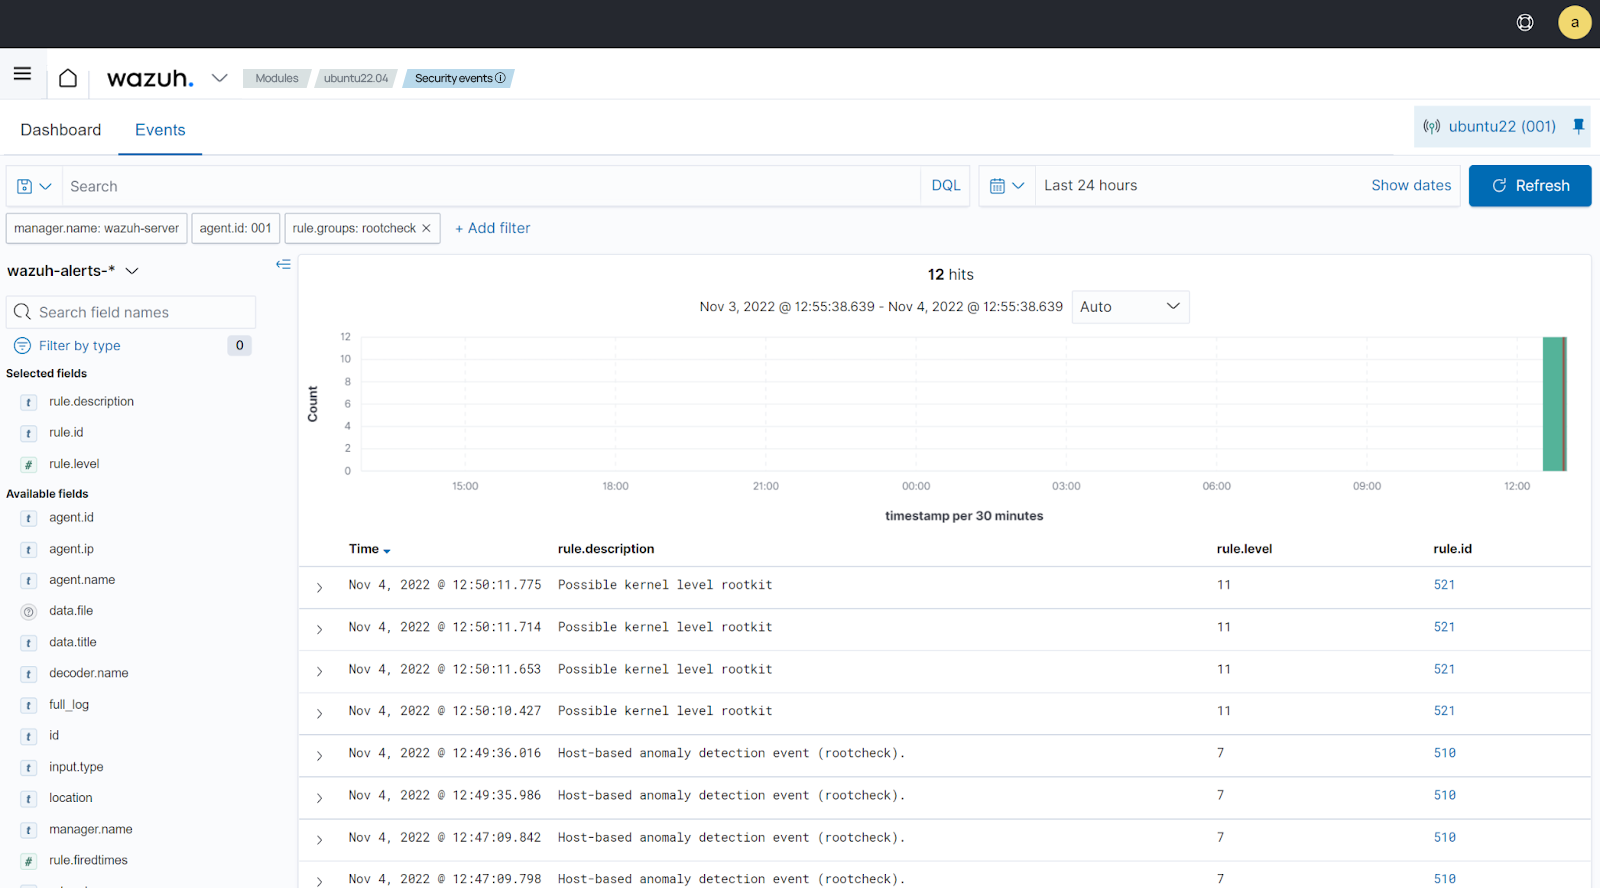
You can visualize the alert data in the ThreatLockDown dashboard. To do this, go to the Threat Hunting module and add the filters in the search bar to query the alerts.
rule.groups:rootcheck
Remember, if you run the same kill -31 command as before against rsyslogd, the rsyslogd process becomes visible again. The subsequent rootcheck scan would no longer generate alerts about it.